4 Axis Foam Airfoil Tutorial
1. Make sure you have version
2.0.0.71 or later.
2. Download airfoil.zip
and save to your DeskCNC folder.
3. Select menu Options - Misc., set the post
Processor to 'FourAxisLinear'.
4. Select menu Options - Foam, set the Wire Diameter
= 0.125 and the Step = 0.010.
5. Select menu Setup - Machine Setup - Machine, set
your machine to 4 axis w/ Linear.
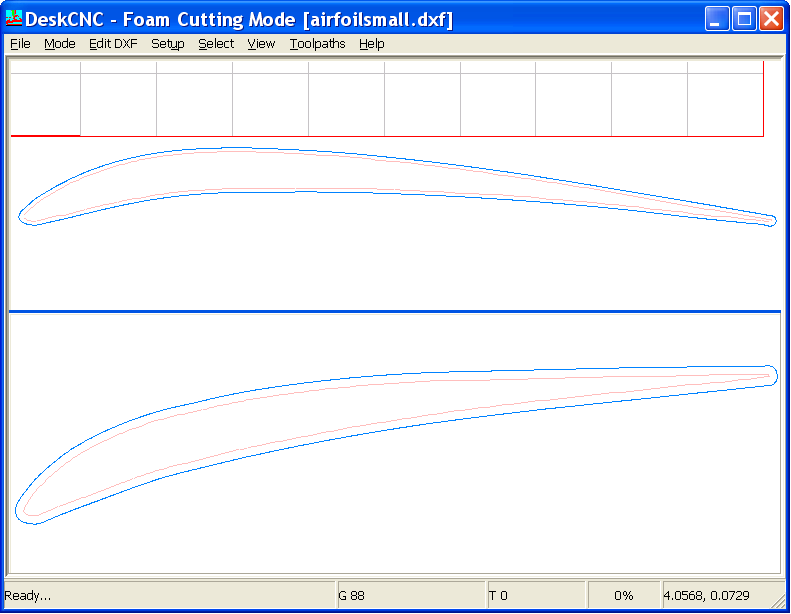
6. Select menu File - Foam Cutter - Open Top/Left/Larger
and select the airfoilbig.dxf file.
7. Select menu File - Foam Cutter - Open Bottom/Right/Smaller
and select the airfoilsmall.dxf file.
a. The screen
should look like...
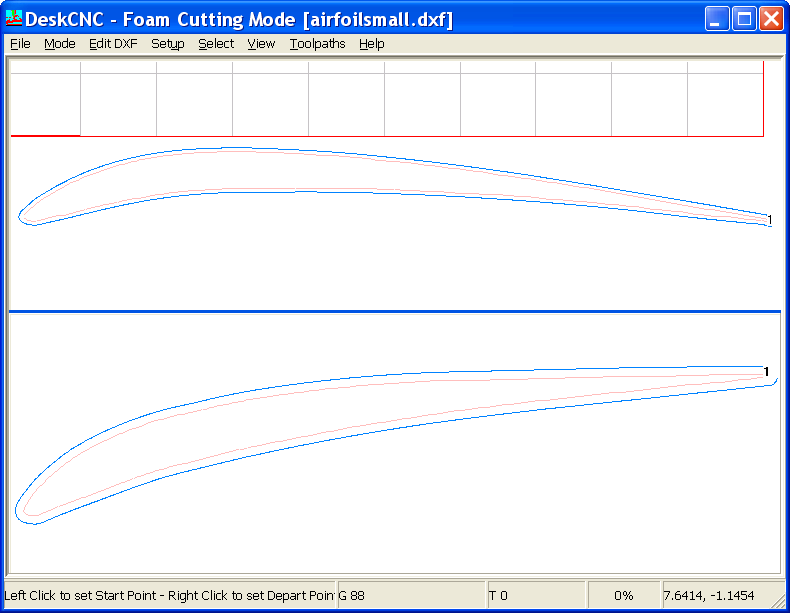
8. Select menu View- Information Tags, a marker is
placed at the beginning of each region.
9. Select menu Edit DXF - Change Start/Depart.
a. Left Click
on the Top Tail of each airfoil. The marker is positioned at this
point showing the Start of the region.
b. Your screen
should look like this...
10. Select menu Toolpaths - Four Axis Foam Cut and
enter the following...
a. Feedrate
= 30.0, Approach Height = 0.5.
b. The Approach
Height is the absolute height the wire will traverse at to reach the Start
Point of each region.
c. Click the
Create button. Toolpaths are created with the approach settings.
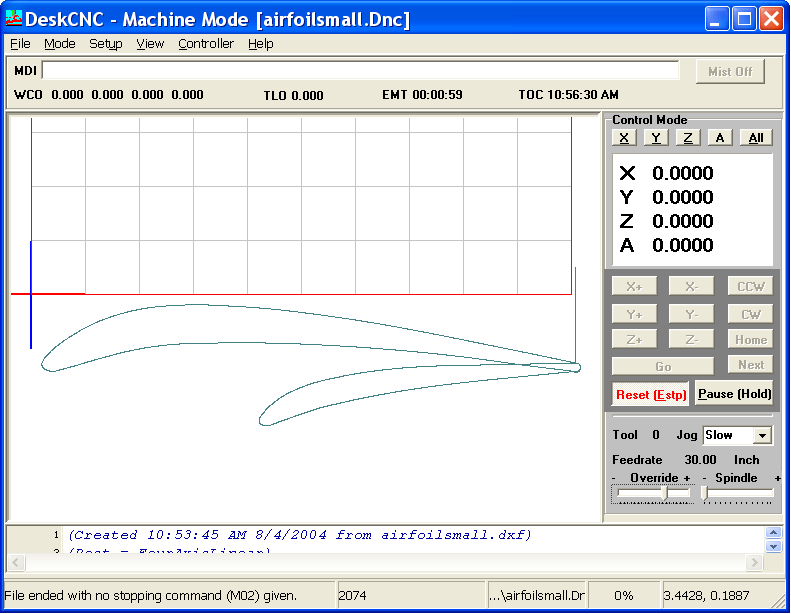
11. Select menu Toolpaths - Run Machine.
a. Accept the
default filename and click OK.
b. The toolpath
GCode file is created and automatically loaded into the GCode Editor.
12. The GCode editor will look like this...
13. If you have the optional DeskCNC Controller
attached, you can now run your hot wire foam cutter and create this airfoil.
a. The Hot Wire
will start and end at the same time near the tail of the Airfoil.